In today’s fast-paced world, the ability to capture moments directly from your iPhone 14’s screen is indispensable. Whether you’re aiming to share a gameplay achievement, create a tutorial, or save a memorable video call, knowing how to screen record on iPhone 14 is a skill worth mastering.
Embark on the Screen Recording Adventure
Initiating a screen recording on your iPhone 14 is akin to setting off on a digital adventure. The journey begins in the Settings, where the Control Center harbors the treasure — the Screen Recording button. This feature allows you to record audio and video activities on your screen with just a few taps. However, before you can utilize this function, you must first add the Screen Recording button to your Control Center.
Setting Sail: Adding the Screen Recording Button
To add the Screen Recording feature to your Control Center, navigate to Settings > Control Center. Here, you’ll find the option to include Screen Recording in your Control Center’s arsenal. With this action, you equip yourself with the tool needed to capture your digital experiences effortlessly.
The Voyage of Capturing Your Screen
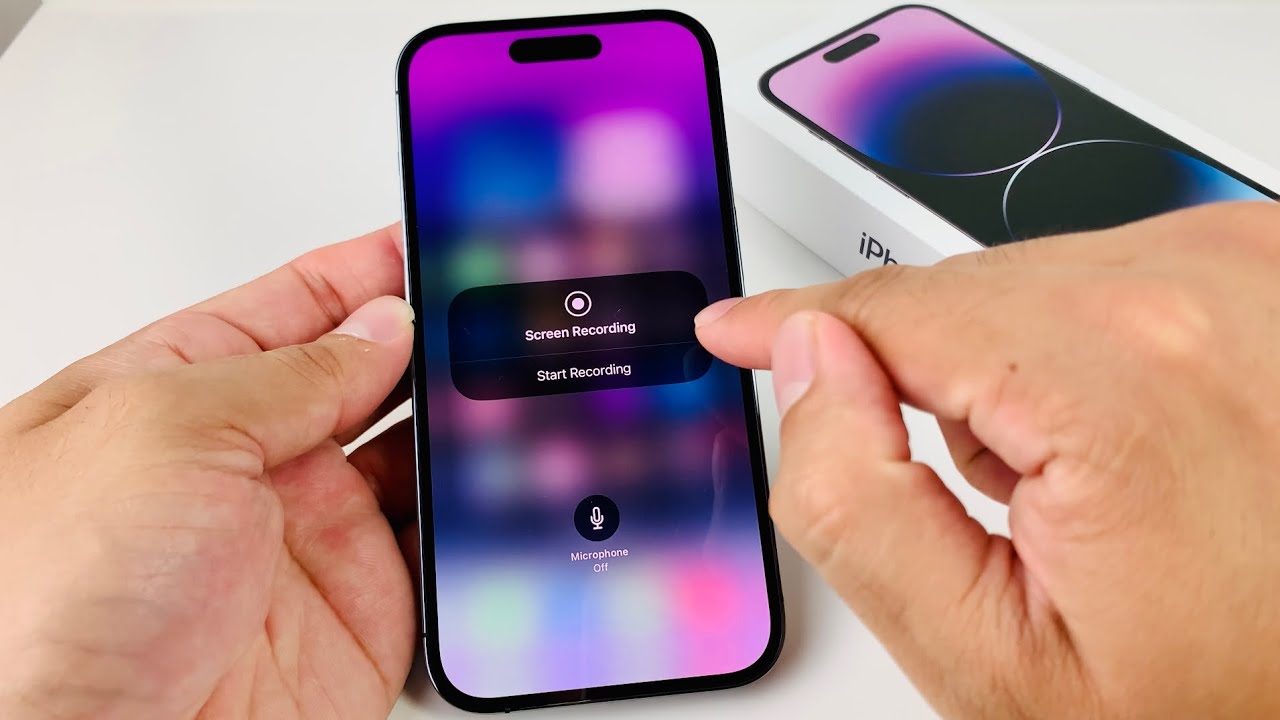
With the Screen Recording button now at your disposal, capturing your screen’s happenings becomes as simple as tapping a button. Swipe down to access the Control Center and hit the Screen Recording icon. A brief countdown ensues, preparing you for the recording. As the recording starts, a red indicator appears, serving as your compass throughout this digital journey. To halt the recording, tap the red status bar and choose ‘Stop’. Your recording then safely anchors in the Photos app.
Navigating Through Your Recordings
After your screen recording journey concludes, the treasure you’ve collected awaits in the Photos app. This digital chest not only stores your recordings but also organizes them, making it easy to revisit your adventures.
Enhancing Your Screen Recording Expedition
Your iPhone 14 screen recording voyage doesn’t end with just capturing videos. The iOS platform offers tools to edit and share your recordings, allowing you to trim, add filters, or even include text before sharing your digital conquests with the world.
Final Reflections on Your Digital Voyage
Embarking on a screen recording journey with your iPhone 14 unveils a realm of digital possibilities. From capturing fleeting moments to creating content that educates and entertains, the power rests in your hands.
Charting New Territories: FAQs
- How can I make my iPhone 14 screen recordings more engaging?
Enhance your recordings by utilizing the editing tools available in the Photos app. Adding music, text, or filters can transform a simple recording into an engaging story. - Can I record audio from my iPhone while screen recording?
Yes, you can include both external sounds and your voice by long-pressing the Screen Recording button in the Control Center and tapping the Microphone icon. - Where do my screen recordings get saved?
All screen recordings automatically save to the Photos app, under the ‘Screen Recordings’ album, making them easy to find and share. - Why can’t I find the Screen Recording option in my Control Center?
If the Screen Recording option isn’t in your Control Center, you may need to add it via Settings > Control Center > Customize Controls. - Can I share my iPhone 14 screen recordings directly from my device?
Absolutely! After editing, you can share your recordings directly from the Photos app to social media platforms, messages, or emails, connecting your digital adventures with the world.
In mastering how to screen record on iPhone 14, you unlock a world of digital storytelling and content creation, enriching your digital life and sharing your experiences with ease.